How to transfer files to or from Amazon S3
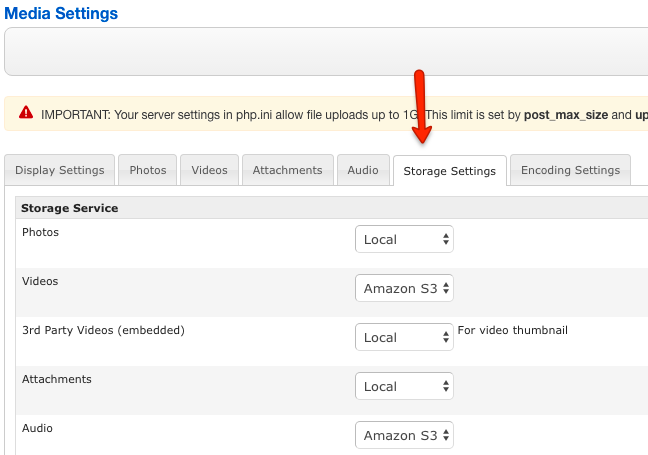
JReviews allows you to specify where the media files will be stored, locally or on Amazon S3, the settings can be found Media Settings -> Storage Settings:
If you have an existing site with existing media files, changing these settings will not automatically transfer the files, the settings just tell JReviews where to look for the files, so you have to transfer existing media files yourself before changing the settings.
To transfer the files from or to Amazon S3 buckets, the fastest solution is to use the AWS CLI (Command Line Tools).
Installing AWS CLI
If your PC/Server has Python package manager installed, you can easily install AWS CLI using this command:
sudo pip install awscli
or this one:
sudo easy_install awscli
If not, install AWS CLI using one of the other available methods explained in the AWS User Guide.
Configuring AWS CLI
First run this command:
aws configure
and enter your API Key and API Secret when asked.
Transferring files
Whether you are uploading files to Amazon S3 or downloading them from S3 to a local folder, the process is the same. First go to the local folder in the Terminal, for example, to transfer photos, go to the /media/reviews/photos/ folder, then run this command, but replace "my-photo-bucket" with the name of the your bucket in S3:
aws s3 sync s3://my-photo-bucket .
The tool will start transferring the files and once it completes, you can change the storage location settings in JReviews.
