Difference between revisions of "Custom module positions in JReviews theme files"
From JReviews Documentation
(→Example) |
|||
| Line 51: | Line 51: | ||
=== Example === | === Example === | ||
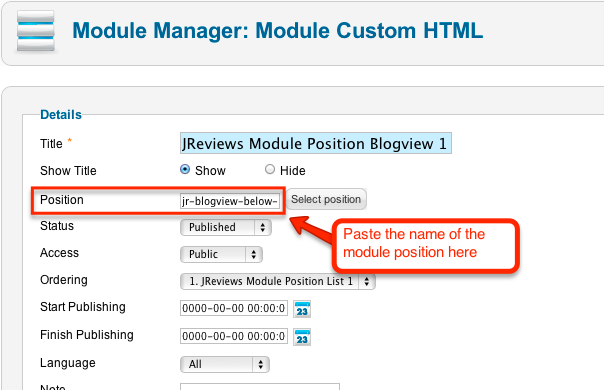
| − | To display a module below first listing on blogview page, edit the module in Module Manager and paste '''jr-blogview-below-listing1''' to the Position input | + | To display a module below first listing on blogview page, edit the module in Module Manager and paste '''jr-blogview-below-listing1''' to the Position input. Then press "Enter" to add it. |
[[File:CustomModulePosition1.png]] | [[File:CustomModulePosition1.png]] | ||
Revision as of 12:56, 4 May 2020
Adding custom module positions
You can create a custom module position in a JReviews theme file using this code:
<?php $Jreviews->loadModulePosition('user1'); ?>
Replace user1 with the actual position name that you want.
Assigning modules to default module positions in JReviews themes.
JReviews has some default module positions (useful for assigning modules with ads between listings and reviews):
All list pages:
- jr-listpage-below-pagetitle
- jr-listpage-below-map
Blogview list page:
- jr-blogview-below-listing1
- jr-blogview-below-listing2
- jr-blogview-below-listing3
- jr-blogview-below-listing4
- jr-blogview-last
Listing detail page:
- jr-detail-below-fields
- jr-detail-below-socialbookmarks
- jr-detail-below-bottom-media
- jr-detail-above-reviews ← also below map
- jr-detail-above-map ← only shows if map is present on page
- jr-detail-below-map ← only shows if map if present on page
- jr-detail-below-editorreviews
- jr-detail-below-review1
- jr-detail-below-review2
- jr-detail-below-review3
Listing Card Layouts
- jr-listings-card-position-1
- jr-listings-card-position-2
- jr-listings-card-position-3
- jr-listings-card-position-4
- jr-listings-card-position-last
All pages with a list of reviews
- jr-reviewspage-above-reviews
Example
To display a module below first listing on blogview page, edit the module in Module Manager and paste jr-blogview-below-listing1 to the Position input. Then press "Enter" to add it.
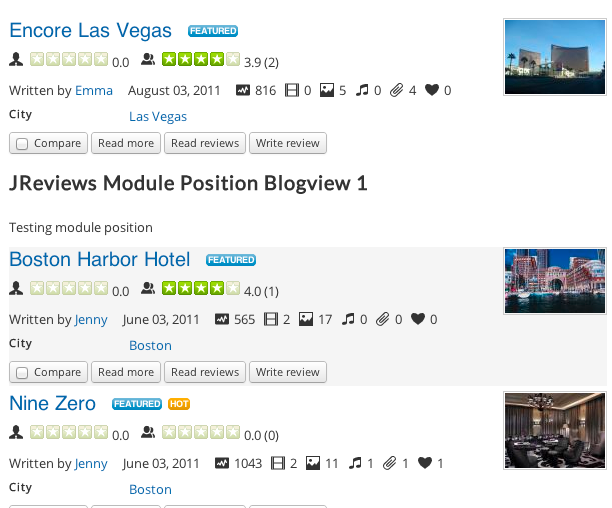
The module will be displayed like this:

