Difference between revisions of "Categories Manager"
| (7 intermediate revisions by 2 users not shown) | |||
| Line 1: | Line 1: | ||
| − | '''Categories Manager''' | + | The final step of JReviews setup is to go to the '''Categories Manager''' to assign a listing type and a directory to each Joomla category that you want to use with JReviews. |
| − | + | Click the '''Setup New''' button and a popup will appear: | |
| + | [[File:categories-manager.png]] | ||
| − | + | First select a listing type and a directory then choose all categories that will belong to that listing type and directory and click the '''Save''' button. | |
| − | + | '''Important:''' If you created multiple levels of categories, you must include all of them (both parent and child categories). For parent categories you can also choose '''This category will not have listings''' instead of a listing type. Only last level categories should have a listing type assigned. Also, all levels of categories must belong to the same directory (a subcategory must belong to the same directory as its parent category). | |
| + | |||
| + | If you made a mistake with the category assignment, you can remove the category by clicking on the '''X''' button at the and of the category row: | ||
| + | |||
| + | [[File:categories-manager2.png]] | ||
| + | |||
| + | After you remove the category, you will be able to set it up again, but removing the categories will be possible only until listings in those categories will have reviews. | ||
| + | |||
| + | When you complete your JReviews setup, it is necessary to adjust the configuration settings and to create JReviews menu items. | ||
Latest revision as of 14:57, 19 February 2014
The final step of JReviews setup is to go to the Categories Manager to assign a listing type and a directory to each Joomla category that you want to use with JReviews.
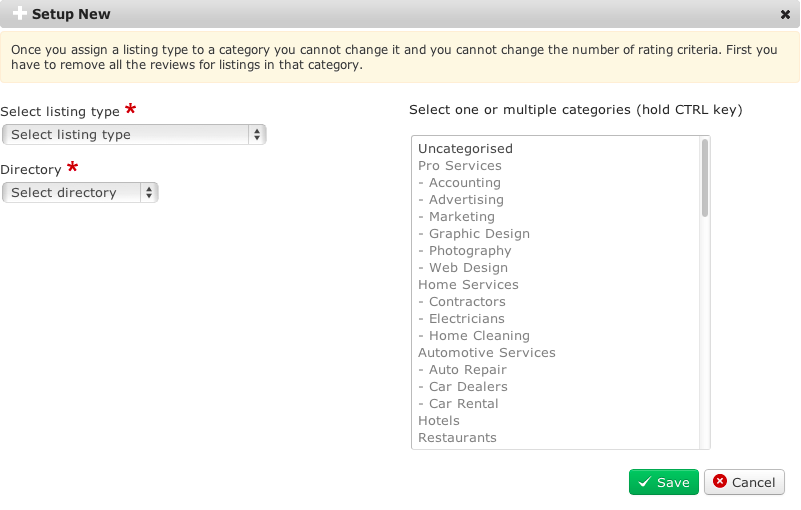
Click the Setup New button and a popup will appear:
First select a listing type and a directory then choose all categories that will belong to that listing type and directory and click the Save button.
Important: If you created multiple levels of categories, you must include all of them (both parent and child categories). For parent categories you can also choose This category will not have listings instead of a listing type. Only last level categories should have a listing type assigned. Also, all levels of categories must belong to the same directory (a subcategory must belong to the same directory as its parent category).
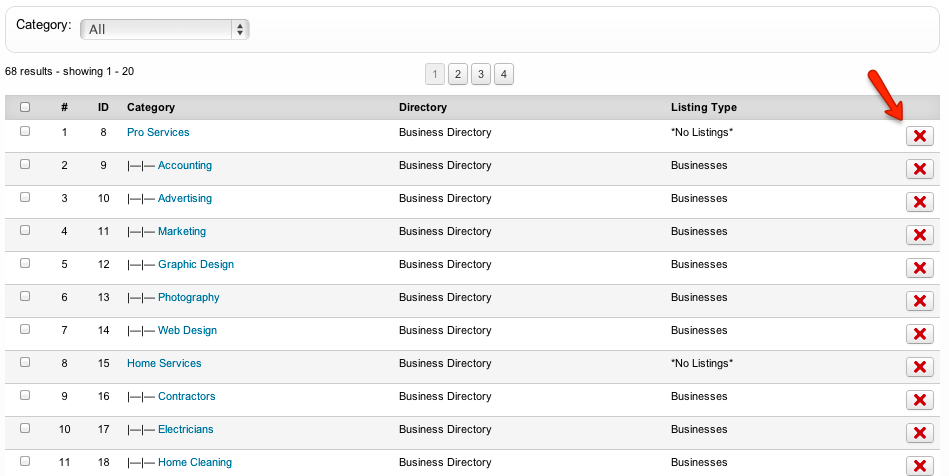
If you made a mistake with the category assignment, you can remove the category by clicking on the X button at the and of the category row:
After you remove the category, you will be able to set it up again, but removing the categories will be possible only until listings in those categories will have reviews.
When you complete your JReviews setup, it is necessary to adjust the configuration settings and to create JReviews menu items.

