Difference between revisions of "How to create Google Maps API keys"
(→Enabling the APIs) |
|||
| Line 11: | Line 11: | ||
[[File:Google-apis-credentials.png]] | [[File:Google-apis-credentials.png]] | ||
| − | In the new popup | + | In the new popup you will get the key: |
| + | |||
| + | Click '''Close''' and then click on the key to edit its name and optionally restrict it. | ||
[[File:Google-apis-server-key.png]] | [[File:Google-apis-server-key.png]] | ||
| − | Next | + | Next change the name of the key and optionally the IP address of your server, then click the '''Save''' button. It is recommended to leave Key restriction disabled initially and add it later once you confirm that the key works. The Server key is used to Geocode addresses in the GeoMaps add-on administration. |
[[File:Google-apis-server-key2.png]] | [[File:Google-apis-server-key2.png]] | ||
| − | |||
| − | |||
| − | |||
| − | |||
== Creating the browser key == | == Creating the browser key == | ||
Revision as of 17:21, 20 September 2016
Google recently started requiring API keys for displaying the maps on your website. To create the API keys, go to the https://console.developers.google.com.
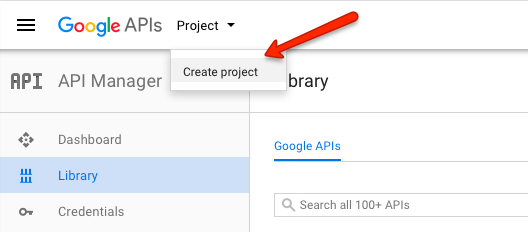
When you open the Google API Console for the first time, google will ask you to create a new project. If you plan to have multiple websites, it is recommended to create separate projects for them, so that each website has its own API keys:
Contents
Creating the server key
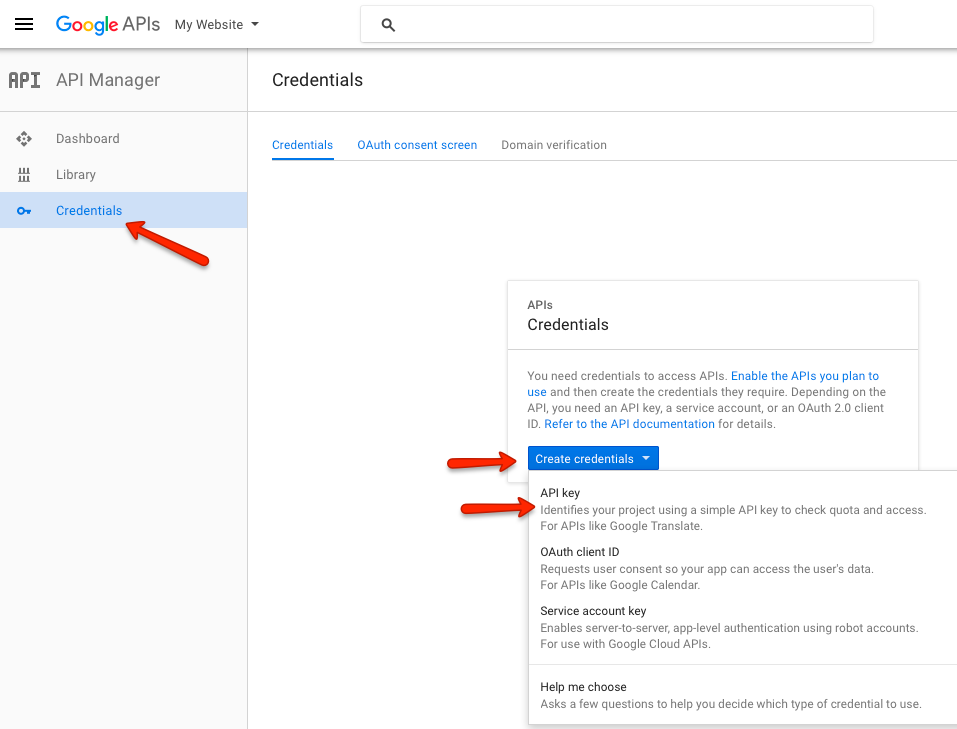
Once you create the first project and select it, click the Credentials link in the sidebar, then click the Create Credentials button and in the dropdown choose API Key:
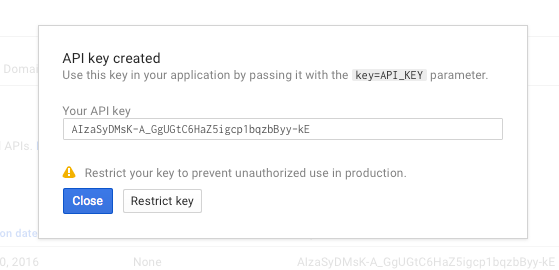
In the new popup you will get the key:
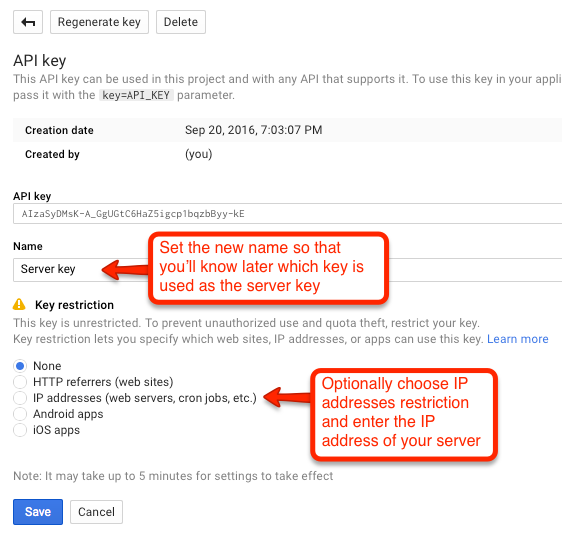
Click Close and then click on the key to edit its name and optionally restrict it.
Next change the name of the key and optionally the IP address of your server, then click the Save button. It is recommended to leave Key restriction disabled initially and add it later once you confirm that the key works. The Server key is used to Geocode addresses in the GeoMaps add-on administration.
Creating the browser key
Click the Create Credentials button and in the dropdown choose API Key. In the new popup choose the Browser Key:
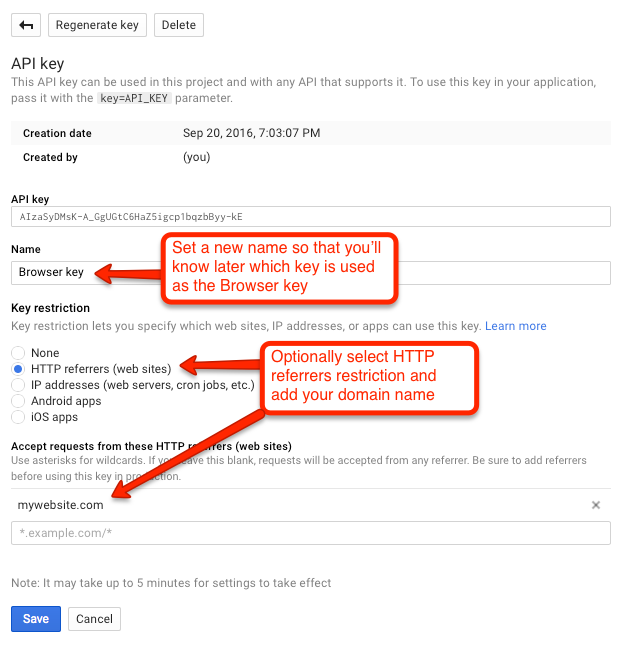
Next enter the name of the key and optionally the domain from which requests will be accepted, then click the Create button:
File:Google-apis-browser-key2.png
You will get the API key in the popup. Copy it somewhere safe and click Ok.
Enabling the APIs
To use all available features of the GeoMaps add-on, you will need to enable these APIs:
- Google Maps JavaScript API
- Google Static Maps API
- Google Maps Geocoding API
- Google Maps Geolocation API
- Google Places API
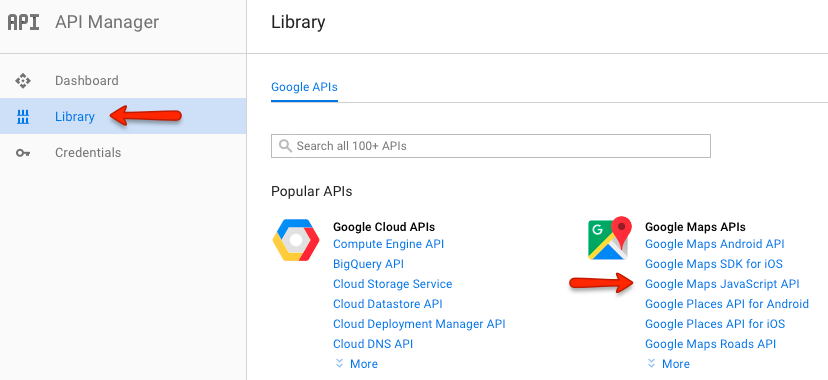
Click the Library link in the sidebar and click on one of the APIs:
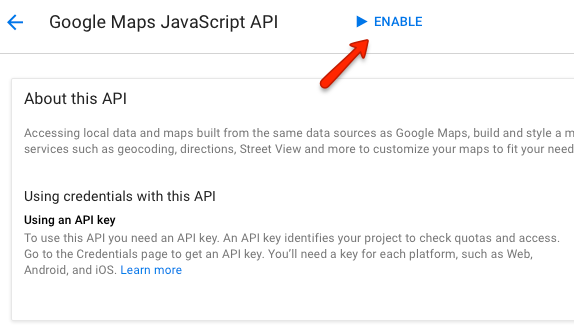
On the next screen, click the Enable button:
Go back to the Library and repeat the same steps to enable the other 3 APIs.
Adding API Keys to the GeoMaps add-on configuration
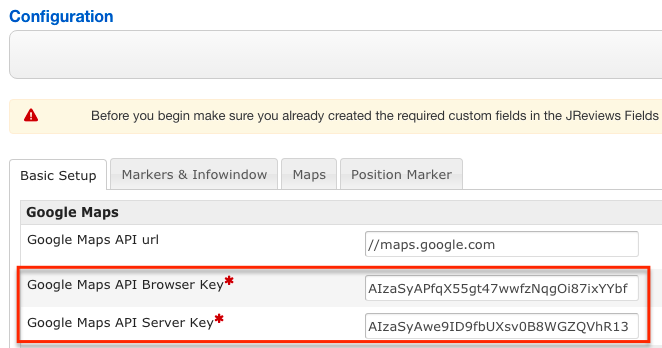
For the GeoMaps add-on to use the APIs, enter the API keys you created into the GeoMaps Configuration:
Save the configuration and click the Clear Cache & File Registry link in JReviews sidebar. The maps should now work on the frontend of the site if you fully configured the GeoMaps add-on.
