PaidListings Add-on Configuration
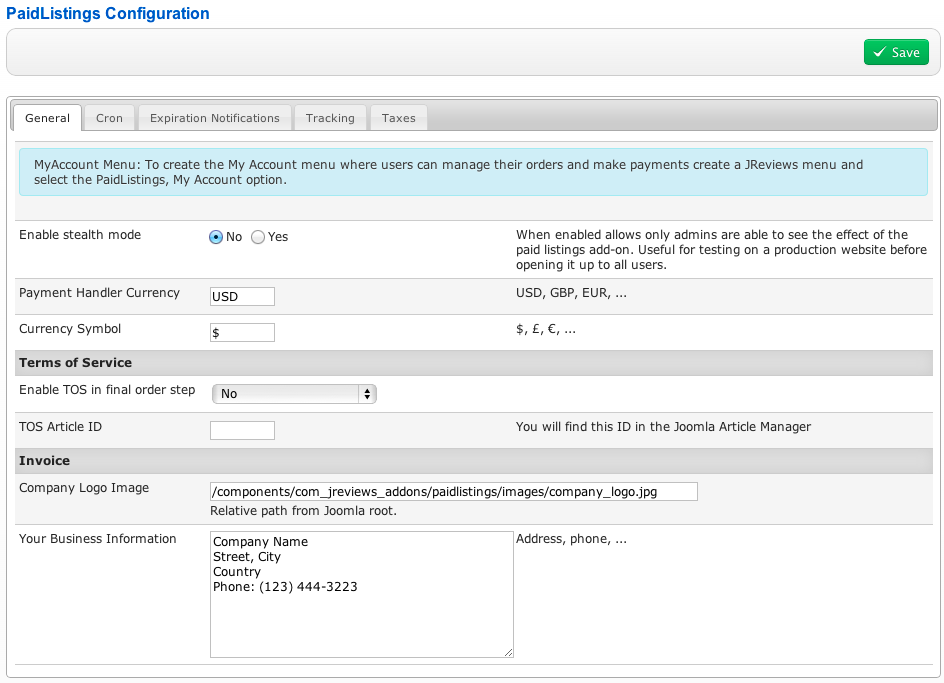
General Settings
Enable stealth mode - the stealth mode should be enabled only if you installed the PaidListings add-on on an active site where users are allowed to submit listings for free. To avoid problems with those existing listings, enable the stealth module until you setup the pricing plans and generate orders for all existing listings. Regular users will not see the effects of the PaidListings add-on when the stealth mode is enabled. After you finish the PaidListings setup, disable the stealth mode for users to be be able to see the plans and purchase listings.
Enable TOS in final order step:
- No
- Yes, without checkbox - the user agrees with TOS by completing the order
- Yes, with checkbox - the user needs to check the checkbox to agree with TOS before completing the order
TOS Article ID - enter the ID of the TOS article from the Joomla Article Manager.
Company Logo Image - here you can set the path to your company's logo that will be included on invoices.
Your Business Information - your address, phone and other info for the invoice.
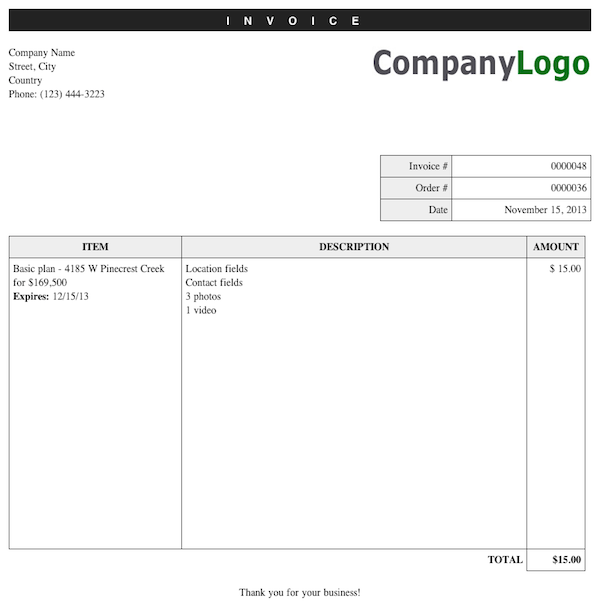
Users will be able to enter their information for the invoice on the My Account page. On the same page they will find a button for a printable Invoice next to each order.
Here is an example of an invoce:
If you want to change the look of the invoice, edit this theme file:
- /components/com_jreviews_addons/paidlistings/views/themes/paidlistings/paid_invoice/index.thtml
Cron
Here you can set cron periods for scheduled PaidListings actions.
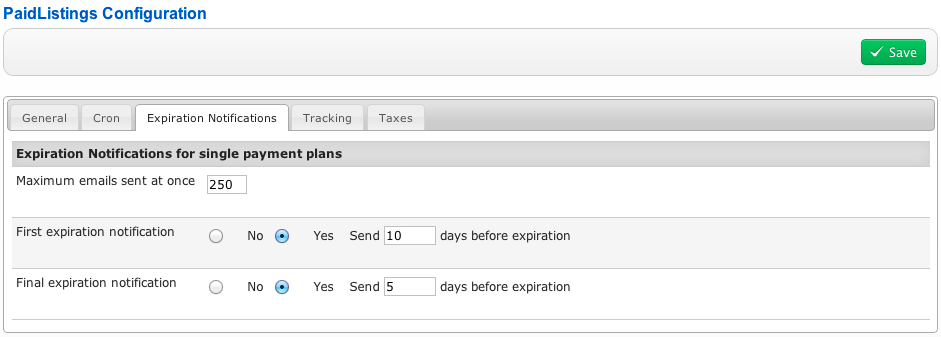
Expiration Notifications
Choose when will users get notification emails for plan expiration.
Tracking
You can insert Javascript tracking code for Google Analytics, for the following order flow steps:
Paid Category Selection in Submit Listing Form - user selects a paid category when submitting a listing
<script type="text/javascript">
  var pageTracker = _gat._getTracker("UA-xxxxx-x");
  pageTracker._initData();
  pageTracker._trackPageview('/paid-category-selected');
</script>
Submit Listing - plan selected and listing submitted. Valid tags: {order_amount}, {plan_name}
<script type="text/javascript">
  var pageTracker = _gat._getTracker("UA-xxxxx-x");
  pageTracker._initData();
  pageTracker._trackPageview("/listing_submission");
  pageTracker._addTrans(
    {order_amount},
    "{plan_name}"
);
</script>
Order Form - order form dialog shown, user can change plan so no tags available
<script type="text/javascript">
  var pageTracker = _gat._getTracker("UA-xxxxx-x");
  pageTracker._initData();
  pageTracker._trackPageview("/order_form");
</script>
Submit Order - order submitted. Valid tags: {order_amount}, {order_id}, {plan_name}
<script type="text/javascript">
  var pageTracker = _gat._getTracker("UA-xxxxx-x");
  pageTracker._initData();
  pageTracker._trackPageview("/order_submission");
  pageTracker._addTrans(
    {order_id},
    {order_amount},
    "{plan_name}"
);
</script>
Order Complete - order complete page. Valid tags: {order_amount}, {order_id}, {plan_name}
<script type="text/javascript">
  var pageTracker = _gat._getTracker("UA-xxxxx-x");
  pageTracker._initData();
  pageTracker._trackPageview("/order_completed");
  pageTracker._addTrans(
    {order_id},
    {order_amount},
    "{plan_name}"
);
</script>
In all examples above, replace "UA-xxxxx-x" with your Google Analytics ID.
Google Analytics tracking code must be already loading on your site.
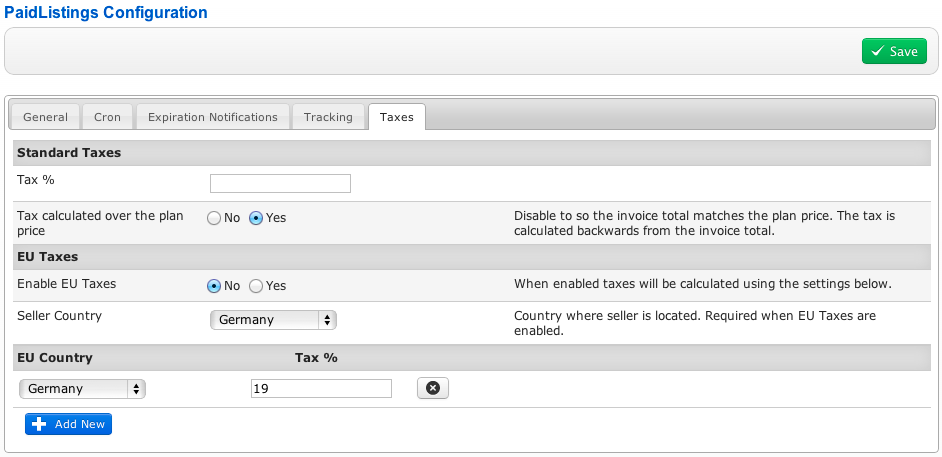
Taxes
If your country's business regulations require to charge taxes, here you can setup the tax percentages.


