Difference between revisions of "PaidListings Add-on Configuration"
| Line 13: | Line 13: | ||
| − | [[File:PLInvoice. | + | [[File:PLInvoice.jpg]] |
Revision as of 16:09, 3 June 2010
General
If you enable stealth mode, only admins will be able to see the effect of the paid listings add-on.
This is useful for testing on a production website before opening it up to all users.
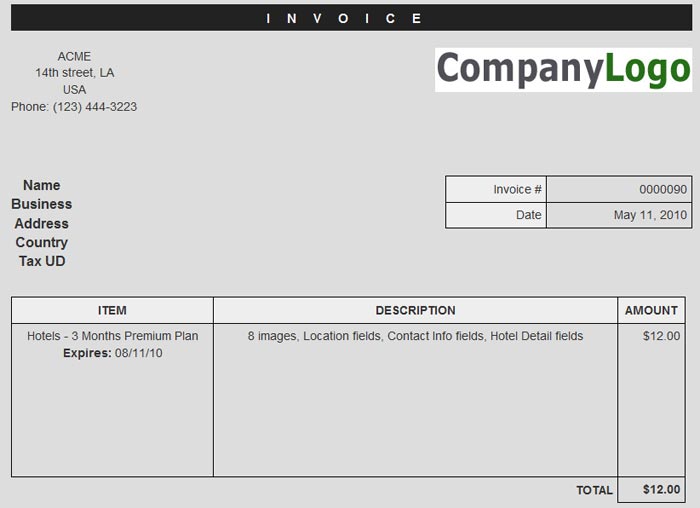
The Company name and business info will be outputted on the printable invoice, here is an example:
If you want to change the look of the Invoice, edit this theme file:
- /components/com_jreviews_addons/paidlistings/views/themes/paid_addon/paidlistings/paidlistings_invoice_detail.thtml
Expiration notifications are triggered when a user visits the list page on the site or when the admin logs in to the JReviews admin. They will be sent out at or after the time you set when a visitor views a list page.
Check run daily starting at the specified time whenever a user visits a list page. Expired orders will be marked as inactive so users can place a new order for the expired listings.
You can edit the orders' expiration dates to today's date for testing and also modify the days before expiration in the configuration to days that would trigger an email.
Tracking/Analytics
You can insert javascript tracking code, like for Google Analytics, for the following order flow steps:
- Paid Category Selection in Submit Listing Form - user selects a paid category when submitting a listing
Example:
<script type="text/javascript">
  var pageTracker = _gat._getTracker("UA-xxxxx-x");
  pageTracker._initData();
  pageTracker._trackPageview('/paid-category-selected');
</script>
- Submit Listing - plan selected and listing submitted
Example:
<script type="text/javascript">
  var pageTracker = _gat._getTracker("UA-xxxxx-x");
  pageTracker._initData();
  pageTracker._trackPageview("/listing_submission");
  pageTracker._addTrans(
    {order_amount},
    {plan_name}
);
</script>
- Order Form - order form dialog shown, user can change plan so no tags available
Example:
<script type="text/javascript">
  var pageTracker = _gat._getTracker("UA-xxxxx-x");
  pageTracker._initData();
  pageTracker._trackPageview("/order_form");
</script>
- Submit Order - order submitted
Example:
<script type="text/javascript">
  var pageTracker = _gat._getTracker("UA-xxxxx-x");
  pageTracker._initData();
  pageTracker._trackPageview("/order_submission");
  pageTracker._addTrans(
    {order_id},
    {order_amount},
    {plan_name}
);
</script>
- Order Complete - order complete page
Example:
<script type="text/javascript">
  var pageTracker = _gat._getTracker("UA-xxxxx-x");
  pageTracker._initData();
  pageTracker._trackPageview("/order_completed");
  pageTracker._addTrans(
    {order_id},
    {order_amount},
    {plan_name}
);
</script>
In all examples above, replace "UA-xxxxx-x" with your Google Analytics ID.
Google Analytics tracking code must be already loading on your site.


