PaidListings Add-on Installation
The addon is installed via the JReviews Installer/Updater menu under the Maintenance header in the JReviews administration.
To install or update the addon you must have previously purchased it, your JReviews version needs to match or be greater than the one specified for the addon and you must have a current Upgrades Package for your license JReviews license.
If you purchased the addon, but it still says "addon not active for this license", go to the JReviews admin license screen, clear the local key text area and re-submit the license number. This will fetch a new local key that includes the addon information.
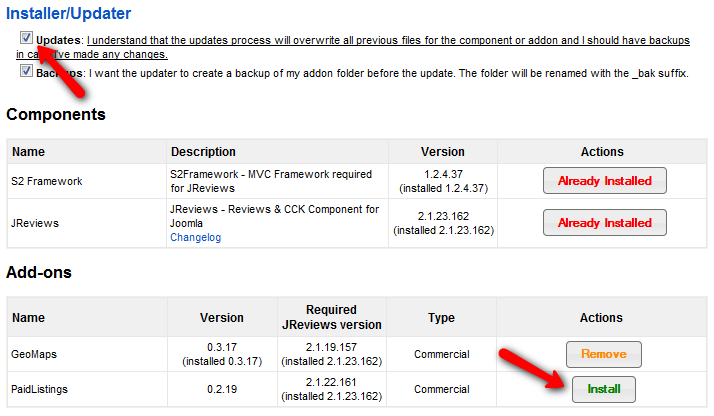
Check the Updates checkbox, and click on the install button next to the PaidListings Add-on like on this image:
The addon will be installed in this directory:
- root/components/com_jreviews_addons/paidlistings
Reload the page to see the PaidListings link appear under the Addons header on the left sidebar.

